+1 (317) 804-2330 | info@ballsystems.com | Blog


Upgrading your LabView/VeriStand software platforms to the latest version has always been an interesting dilemma. Engineers must confirm whether a given test system will operate in the same way within a new platform environment or whether the upgrade introduces new operational issues due to system level and technology induced differences in the new platform environment.
This confirmation process is generally considered tedious and can trigger some anxiety within your organization. Using a tried and true set of steps, this blog post will attempt to ease that anxiety. The following explains the process we successfully used to convert a 2014 LabVIEW custom device combined with 2014 VeriStand into their corresponding 2018 versions.
What is a Custom Device?
Custom devices enable you to customize and extend the functionality of NI VeriStand by packaging LabVIEW code, or any code you can call from LabVIEW, into a device that you can add to an NI VeriStand system definition file and deploy to a target
What is a VeriStand Add-on?
VeriStand delivers most of the functionality needed for real-time testing applications but the use of add-ons is often needed to provide customization and the ability to extend the environment’s capabilities. Some add-ons are listed below:
Initial Research To Locate Additional Add-ons and Custom Devices
Most VeriStand Add-ons are available on NI’s website.
There are a variety of VeriStand custom devices available on NI GitHub public repository. Most of these devices are not supported by NI. However, there are a few that are. NI provides a detailed list of supported devices.
There are several steps required to convert or update a custom device to the latest version of LabVIEW and VeriStand. The suggested steps below are proven to work in most applications.
LabVIEW
The suggested steps required to upgrade a Custom Device to a newer version of LabVIEW are as follows:
Note: Before moving to VeriStand section be sure to have your custom devices built with no errors
VeriStand
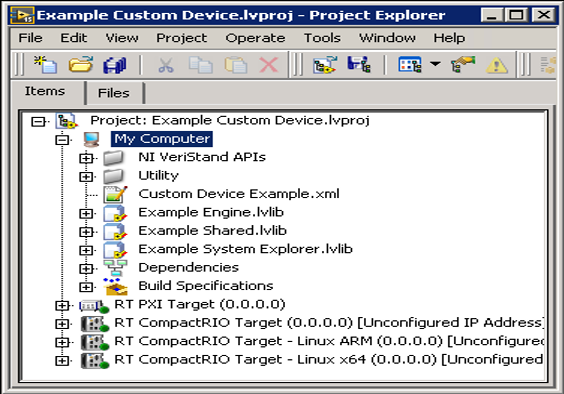
In order to access the custom devices inside of VeriStand, the newly built custom devices should be placed in the directories below based on the O.S./hardware platform you are running.
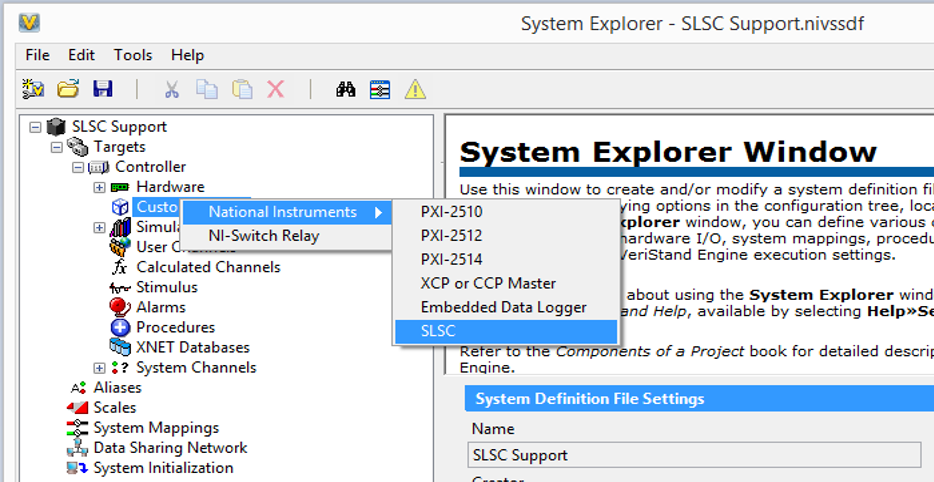
Once the custom device is placed in the correct directory launch VeriStand.
Working through the Custom Device upgrade process can be tedious and demanding. Yes, there are tons of NI resources at your fingertips to guide you along the way. As mentioned before, this article is not a complete guide for all solutions but is intended to help you complete the process systematically. The 4-step process will take time and the question will be: do you have the time to research the specific add-ons needed to successfully upgrade your current system? In addition, do you need an experienced partner to help guide you on your way? Either option will require a little patience and persistence to accomplish the necessary upgrades to your VeriStand custom devices.
Looking for a partner to help you navigate through your software challenges? Contact us today to see how we can help you.


Blog Comments